Skip to content

1

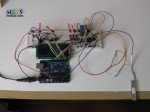
Liquid Filler On Breadboard Part2

In the first part of liquid filler we have made the user interface.
LCD buttons and circular menu were made.
Now it is time to add the relay and the weight sensor.
We will keep working on our breadboard.
In this article we will see how to connect the relay then our load cell amplified by the INA125 and lastly the modified code from the last time.

It is highly recommended to read the relay article and the weight sensors introduction before you start.

...continue reading "Liquid Filling Machine – Liquid Filler Part 2"
Liquid Filler at 20Kg

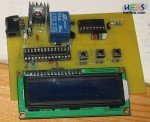
Liquid filler will be our first complete project here at hw2sw! 😎
We have made a series of articles that we will use in order to reach our goal.
Liquid filler is exactly as its name says, an really cheap but accurate liquid  filling machine.
We need to auto-fill bottles with a certain capacity (50 up to 8500gr).
This arduino based project will permit to fill all containers with a certain, user defined, weight limit.
So the machine works on weight base and not on volume, flow or pressure base like other fillers.
Other than the  machine you see in the photo, you need a weighting board that the bottle will sit on and a gravity feed valve that is piloted by liquid filler.
The present solution will weight containers up to 8,5 Kg.

...continue reading "Liquid Filling Machine – Liquid Filler Part 1"

LCD16x2

A liquid crystal display (LCD) is an attractive way for easy communication between the user and hardware.
In this tutorial we will see how to connect a 16x2 LCD display on our arduino using only 6 pins.
As you may noticed always we start from the documentation offered for free of the various hardware manufacturers.
Here is the data-sheet of the LCD Module 1602 A1 .

...continue reading "Connecting a LCD to an Arduino"