Skip to content

Serialino-PCB
Serialino - PCB

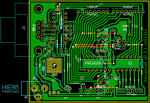
We talk again of Serialino, our Arduino's clone: this time the printed circuit board (PCB) design is shown.
Here beside you find a screen-shot of the PCB of Serialino, numbered 1.0.

Even from here you should be able to distinguish the areas described in the previous post.

Power supply section on the bottom-left; the communication port and IC Max232 on the top-left; the headers on top and bottom; and finally ATMega with external oscillator, then the switch button and the ICSP pin headers.
...continue reading "Serialino – The PCB"

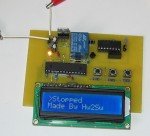
Liquid Filler on PCB

In the last two articles we have worked on the breadboard.
We have seen that the circuit worked well so we need to construct it in PCB and then calibrate it.
We will start with the KiCad schematic file and then we will see the PCB layout.
Then we will construct a weight board with the load cell installed on it.
Once done with this step then we should be able to calibrate the device.
The calibration will be discussed in a next article.

...continue reading "Liquid Filling Machine – Liquid Filler Part 3"