Skip to content

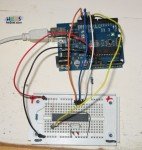
This tutorial explains how to use an arduino duemillanove board as an AVR ISP in order to burn your bootloader into your brand new ATmega168 or ATmega328 chip.
New ATmega chips does not have the arduino bootloader so you have to program them with an external programmer.
If you have an arduino uno you have to use the usbtiny bootloader method and not this one.
Arduino IDE has a demo program called ArduinoISP located at File->Examples->ArduinoISP.
ArduinoISP makes your arduino board an ISP (In System Programmer) capable to program other ATMEGA chips.

...continue reading "Burn Bootloader using Arduino as ISP (ArduinoISP)"
The beauty of micro controllers is that some operations can be achieved in more than a single way.

When you buy them you generally get them free of any software or - better - firmware, totally virgin and ready only to be inserted onto your board.
Sometimes they are bootloaded, that's necessary to communicate with some other specific hardware: ATMega is a good example.
Thanks to Arduino board's popularity is easy to find ATMega microcontrollers directly set to work with it. ...continue reading "Burn Arduino bootloader into ATMega (USBtinyISP)"

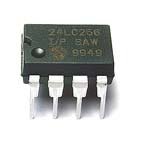
eeprom 24LC256In this tutorial we will discuss a little deeper about the EEPROM, "our hard disk", than the "arduino and memory" generic article posted before.
We will try to overcome the per-byte storage limitation of the EEPROM bundled library.
In the future we will also discuss a little more about the arduino datatypes.
Lets focus at the EEPROM library  for now. As you can see the read function returns the value stored in a certain location (byte).
EEPROM.read(address); //address is the the location to read from (int) and returns the value stored in that location (byte)

The same is valid for the write function
EEPROM.write(address, value); //Where address i
s the the location to wirite in int and value is the byte to write.

As we can see we can read and write to the EEPROM byte values.

...continue reading "EEPROM and Arduino. A deeper view"

Bitwise operators are used in order to modify a bit or bits of any given byte.

So whenever you want to modify less than a byte you can do it using this technique.

Using the bitwise operators you can save memory by packing multiple data items in a single byte.

Do not confuse the boolean operators AND(&&) OR(||) and NOT(!) with the bitwise operators AND(&) OR(|) NOT(~).

Let's start with the four most common bitwise operations : AND , OR , XOR and NOT.

...continue reading "Arduino Bitwise Operators and advanced tricks"

For the first part, click here.

Kicad-PCBnewKicad-PCB-editorOn horizontal bar look at the icon here shown: click to run PCBnew, the embedded PCB editor which to design the circuit mask on.

Editor starts with a black ground.

Kicad-read-netlist
Read NetList

...continue reading "KiCAD. From Software to Hardware Part2"