Skip to content

pfSense firewall
Hardware firewall

We have seen at the "How to assemble a low cost firewall with professional capabilities" article how to construct our cheap firewall.

It is now the time to install our software firewall on our hardware device.
The first step is to find the right pfSense version from the dedicated web site.

Take a look at the versions page to find out which version fits at your needs.
1)pfSense-2.X.X-RELEASE-arch.iso.gz  --> Live CD/Full installer 
2)pfSense-memstick-2.X.X-RELEASE-arch.img.gz --> USB stick installer 
3)pfSense-2.0.1-RELEASE-size-arch-nanobsd.img.gz --> NanoBSD/embedded (Serial Console) 
4)pfSense-2.0.1-RELEASE-size-arch-nanobsd_vga.img.gz --> NanoBSD/embedded (VGA Console) 

In our case we will focus in the NanoBSD version embedded serial console.
From pfSense we see that the "embedded version is specifically tailored for use with any hardware using Compact Flash rather than a hard drive.
 CF cards can only handle a limited number of writes, so the embedded version runs read only from CF, with read/write file systems as RAM disks".

...continue reading "pfSense installation to a CF Card"

Atten-APS-1502D
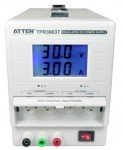
Atten TPR 3003T

Time ago i bought the ATTEN TPR 3003T regulated power supply.
That device had constant voltage and constant current mode.
Offered voltage and current tuning by using two potentiometers a coarse one and a fine tune one.
It was a 30V / 3A general purpose power supply.
Recently i came across with Atten-APS-1502D. It was a voltage power supply (15V/2A) at a very attractive price.
I didn't spent further time and i bought that one too since i was a happy customer 🙂 .
When it arrived i noticed that the voltage selection would be really hard to set since it didn't offered a pair of coarse/fine tune potentiometers like the 3003T but only a global potentiometer.

I must admit that i didn't knew about that when i was buying it.
When i tested it, my thoughts become reality, since the voltage selection was way too hard to set.
The potentiometer was not only single turn but really small that make things even harder.
That was it ! I had bought the classic old school power supply without even knowing it !  🙁
Here is some ideas of how to fix this fine tune problem...

...continue reading "Add fine tunning on a cheap voltage regulated DC power supply"

Liquid Filler 3D

We have already seen till now how we have constructed our project in PCB .
Liquid filler at this point needs calibration.
In this article we will discuss the calibration method.
The first step is to dimension correctly the RG resistor.
From the weight sensors article we already know that :
a) For a 1Kg load cell we are going to need Gain=1,07421875/0,005473=196 for a 1.1V arduino reference analogReference(INTERNAL); So we need a Rg=312 Ohm.

b) For a 20Kg load cell we need a Gain =  3925 for a 1.1V arduino reference analogReference(INTERNAL);
So we need a Rg=15 Ohm.

...continue reading "Liquid Filling Machine – Liquid Filler Part 4"

Liquid Filler on PCB

In the last two articles we have worked on the breadboard.
We have seen that the circuit worked well so we need to construct it in PCB and then calibrate it.
We will start with the KiCad schematic file and then we will see the PCB layout.
Then we will construct a weight board with the load cell installed on it.
Once done with this step then we should be able to calibrate the device.
The calibration will be discussed in a next article.

...continue reading "Liquid Filling Machine – Liquid Filler Part 3"

1

Liquid Filler On Breadboard Part2

In the first part of liquid filler we have made the user interface.
LCD buttons and circular menu were made.
Now it is time to add the relay and the weight sensor.
We will keep working on our breadboard.
In this article we will see how to connect the relay then our load cell amplified by the INA125 and lastly the modified code from the last time.

It is highly recommended to read the relay article and the weight sensors introduction before you start.

...continue reading "Liquid Filling Machine – Liquid Filler Part 2"