Skip to content

1

Connecting UT61E with the PC

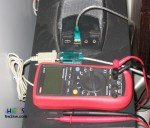
UT61E multimeter has data logging capabilities. Comes with a nice RS323 serial cable.
I have used a Prolific serial to USB cable under Windows 7 in order to connect it with my computer as you can see in the picture.
Normally the latest drivers can be found online.
The official page for this meter is located here.
Clearly from there we can download the data logger software version 2.0 only for Windows.
The version offered from the official web site is buggy but later in this article we can see how we can overcome this problem.
To a huge surprise to me i discovered that the bundled CD of the multimeter has a more updated version of the data logger! It comes with the version 4.01 .
...continue reading "UNI-T UT61E data logging programs"

Connecting arduino with an external programmer

In this quick tutorial we will see how to program our arduino board with the help of an external programmer and not by using the arduino bootloader.
Before proceeding with this tutorial take a look at the "burn arduino with usb tiny" tutorial.
The first thing you have to understand is that by uploading a program with an external programmer you are going to lose your already burned bootloader on your ATMEGA chip.
So before proceeding make sure you can bootload your chips using your external programmer.

...continue reading "Programming arduino with an external programmer"

A-H-A-Project-RFID

In this tutorial we will see how we can connect a RDIF reader into arduino.
We are going to use a 125 Khz RFID module  that can be bought from seeedstudio.
Some 125 Khz tags are also needed. We bought them from ebay but you can also find them on other online shops.
This guide is the first of a series of articles.
Starting from this article we are going to construct from scratch a home alarm based on arduino duemillanove.
Since the project is big we are not going to see a lot of details of each part / sensor.
In the future we will try to cover the theoretical gap.
These series of tutorials will be easy to understand and will help you to construct step by step the "A-H-A" (Arduino Home Alarm) project.

...continue reading "Connecting 125Khz RFID module to arduino – Part 1"

Circular Menus Redux

Seems like the old circular menu class is now incompatible with the new Arduino 1.0 GUI version.
Rober Wagner from the arduino forum described the incompatibility. He also sent to us an email and we thank him for the contribution.
The circular menu seems to interest a lot of people so we decided to "port" the circular menu class into the new Arduino 1.0 GUI.
We will try to describe the class in the future.
Now before starting have a look at the documentation of the "old circular menu".
As always you have to construct the three button configuration on your breadboard.
The down button is on digital port 7 the right button on digital port 6 and the enter button at digital port 5.
In order to find out how to connect buttons on your arduino please read the "arduino and memory how to" tutorial.

...continue reading "Circular menu in arduino redux"

Insert CF Card
Insert CF Card

We have seen the first part of installation in the pfSense installation to a CF Card.
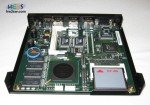
The first step is to insert our CF Card with pfSense into our hardware device.
Find the dedicated slot and insert carefully your CF Card.

We are using a 4G Compact Flash card.
Once inserted the card close your enclosure.
Do not plug the unit into power for the moment.

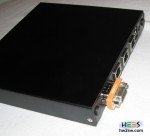
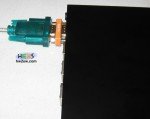
Now connect your null modem to the dedicated RS232 slot.

Use your serial to USB cable and connect the null modem with your PC.
Remember to install the drivers of your serial to USB cable.

Connect-Null-Modem
Connect Null Modem
Connect Serial to USB Cable


...continue reading "pfSense installation second part"