Skip to content

Connecting arduino with an external programmer

In this quick tutorial we will see how to program our arduino board with the help of an external programmer and not by using the arduino bootloader.
Before proceeding with this tutorial take a look at the "burn arduino with usb tiny" tutorial.
The first thing you have to understand is that by uploading a program with an external programmer you are going to lose your already burned bootloader on your ATMEGA chip.
So before proceeding make sure you can bootload your chips using your external programmer.

...continue reading "Programming arduino with an external programmer"

2

Analog to digital converter

A sensor is usually an analog device. Analog devices are connected at the analog ports of arduino.
Arduino  with the use of AnalogRead function can read the analog sensor value from the specified analog pin.
The Arduino board contains a 6 channel 10-bit analog to digital converter. A 10 bit analog to digital converter as we have seen in the "Binary Decimal and Hexadecimal numeral systems" equals to a 210 – 1 = 102410  (0-1023 => 1024 steps).
If the resolution of arduino (1024 steps) does not cover your project you should use an external ADC converter with more that 10 bits.
For example you can connect the LTC2400 ADC which happens to be a 24 bit analog to digital converter.

...continue reading "Weight sensors and arduino"

Relay 5V

In this article we will talk about relays.
The relay is a device that permits with a small voltage to pilot a reed switch.
How this device should be applied on the circuit ?
How can we place it on an arduino ?
All these answers will be cleared in a while.
Let's start with some theory to see what happens in detail.
At the top of the relay we can see the 5V as input pilot voltage.
And we can see the 10A limitation at the 250VAC of the reed switch.
So with a 5 Voltage we can "switch" a 250VAC device that can consume up to 10A (P=V*I=2,5KW).
If you need to pilot a device that consumes more you should use a "bigger" relay that fit at your needs.

...continue reading "Relay and arduino"

The beauty of micro controllers is that some operations can be achieved in more than a single way.

When you buy them you generally get them free of any software or - better - firmware, totally virgin and ready only to be inserted onto your board.
Sometimes they are bootloaded, that's necessary to communicate with some other specific hardware: ATMega is a good example.
Thanks to Arduino board's popularity is easy to find ATMega microcontrollers directly set to work with it. ...continue reading "Burn Arduino bootloader into ATMega (USBtinyISP)"

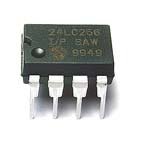
eeprom 24LC256In this tutorial we will discuss a little deeper about the EEPROM, "our hard disk", than the "arduino and memory" generic article posted before.
We will try to overcome the per-byte storage limitation of the EEPROM bundled library.
In the future we will also discuss a little more about the arduino datatypes.
Lets focus at the EEPROM library  for now. As you can see the read function returns the value stored in a certain location (byte).
EEPROM.read(address); //address is the the location to read from (int) and returns the value stored in that location (byte)

The same is valid for the write function
EEPROM.write(address, value); //Where address i
s the the location to wirite in int and value is the byte to write.

As we can see we can read and write to the EEPROM byte values.

...continue reading "EEPROM and Arduino. A deeper view"