Skip to content

1

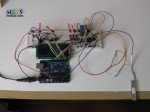
Liquid Filler On Breadboard Part2

In the first part of liquid filler we have made the user interface.
LCD buttons and circular menu were made.
Now it is time to add the relay and the weight sensor.
We will keep working on our breadboard.
In this article we will see how to connect the relay then our load cell amplified by the INA125 and lastly the modified code from the last time.

It is highly recommended to read the relay article and the weight sensors introduction before you start.

...continue reading "Liquid Filling Machine – Liquid Filler Part 2"

2

Analog to digital converter

A sensor is usually an analog device. Analog devices are connected at the analog ports of arduino.
Arduino  with the use of AnalogRead function can read the analog sensor value from the specified analog pin.
The Arduino board contains a 6 channel 10-bit analog to digital converter. A 10 bit analog to digital converter as we have seen in the "Binary Decimal and Hexadecimal numeral systems" equals to a 210 – 1 = 102410  (0-1023 => 1024 steps).
If the resolution of arduino (1024 steps) does not cover your project you should use an external ADC converter with more that 10 bits.
For example you can connect the LTC2400 ADC which happens to be a 24 bit analog to digital converter.

...continue reading "Weight sensors and arduino"

Relay 5V

In this article we will talk about relays.
The relay is a device that permits with a small voltage to pilot a reed switch.
How this device should be applied on the circuit ?
How can we place it on an arduino ?
All these answers will be cleared in a while.
Let's start with some theory to see what happens in detail.
At the top of the relay we can see the 5V as input pilot voltage.
And we can see the 10A limitation at the 250VAC of the reed switch.
So with a 5 Voltage we can "switch" a 250VAC device that can consume up to 10A (P=V*I=2,5KW).
If you need to pilot a device that consumes more you should use a "bigger" relay that fit at your needs.

...continue reading "Relay and arduino"

LCD16x2

A liquid crystal display (LCD) is an attractive way for easy communication between the user and hardware.
In this tutorial we will see how to connect a 16x2 LCD display on our arduino using only 6 pins.
As you may noticed always we start from the documentation offered for free of the various hardware manufacturers.
Here is the data-sheet of the LCD Module 1602 A1 .

...continue reading "Connecting a LCD to an Arduino"

Creating menus for embedded devices is often challenging.
Usually you have very little resources and complicated menus can not be an option.

More buttons offer more possibilities but also a more complex user interface and more hardware resources.

Why more hardware resources?

Going back at the "arduino and memory how to" article we have used the button change example.
One button use one pin as input pin from our arduino processor.
So for more buttons you need more pins.

There are methods that you can "bypass" this problem as we will see in next articles but anyway more buttons = more cost.

...continue reading "Circular menu in arduino"