Skip to content

Creating menus for embedded devices is often challenging.
Usually you have very little resources and complicated menus can not be an option.

More buttons offer more possibilities but also a more complex user interface and more hardware resources.

Why more hardware resources?

Going back at the "arduino and memory how to" article we have used the button change example.
One button use one pin as input pin from our arduino processor.
So for more buttons you need more pins.

There are methods that you can "bypass" this problem as we will see in next articles but anyway more buttons = more cost.
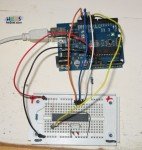
...continue reading "Circular menu in arduino"

The etching is the technique that a strong acid chemical solution "eats" the unprotected copper.

So the etching method can be used for the production of printed circuit boards (PCB) since acid can be used to remove the unwanted copper from a copper clad.
A nice and easy method in order to make printed circuits at home is to use the so called : "toner transfer method". This method will be discussed in another article.
For now keep in mind that you have a copper clad (fr4) with the circuit "printed" (with toner) on it.

So this printed copper board can be etched with an acid solution called etchant.
This acid solution will eat all the unprotected toner and the remained, protected by the toner, copper will be our final printed circuit.

...continue reading "Learn how to make at home an etching solution"

This tutorial explains how to use an arduino duemillanove board as an AVR ISP in order to burn your bootloader into your brand new ATmega168 or ATmega328 chip.
New ATmega chips does not have the arduino bootloader so you have to program them with an external programmer.
If you have an arduino uno you have to use the usbtiny bootloader method and not this one.
Arduino IDE has a demo program called ArduinoISP located at File->Examples->ArduinoISP.
ArduinoISP makes your arduino board an ISP (In System Programmer) capable to program other ATMEGA chips.

...continue reading "Burn Bootloader using Arduino as ISP (ArduinoISP)"

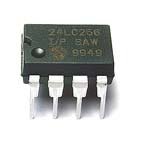
eeprom 24LC256In this tutorial we will discuss a little deeper about the EEPROM, "our hard disk", than the "arduino and memory" generic article posted before.
We will try to overcome the per-byte storage limitation of the EEPROM bundled library.
In the future we will also discuss a little more about the arduino datatypes.
Lets focus at the EEPROM library  for now. As you can see the read function returns the value stored in a certain location (byte).
EEPROM.read(address); //address is the the location to read from (int) and returns the value stored in that location (byte)

The same is valid for the write function
EEPROM.write(address, value); //Where address i
s the the location to wirite in int and value is the byte to write.

As we can see we can read and write to the EEPROM byte values.

...continue reading "EEPROM and Arduino. A deeper view"

Bitwise operators are used in order to modify a bit or bits of any given byte.

So whenever you want to modify less than a byte you can do it using this technique.

Using the bitwise operators you can save memory by packing multiple data items in a single byte.

Do not confuse the boolean operators AND(&&) OR(||) and NOT(!) with the bitwise operators AND(&) OR(|) NOT(~).

Let's start with the four most common bitwise operations : AND , OR , XOR and NOT.

...continue reading "Arduino Bitwise Operators and advanced tricks"