This board is quite simple, so it will requires a small strength to follow.
First of all the ports, both for power supply and communication: it's better to put them as much external as possible, to grant an easy access to them.
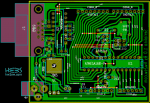
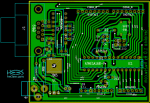
That's why the serial port and the power jack are like you can see in the picture beside.
The ICSP headers are rarely used, so they preferably can be put apart: here in the opposite side.
But as seen in previous article, the most important constrain is represented by the 6-pins and 8-pins headers positioning, in order to respect their reciprocal distances, as on Arduino.
With this problem solved, we proceed with serial port and power jack... and now the work becomes harder, revealing the goodness of prophecy about the two points of guidelines.


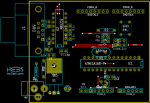
Take a look at the pictures: you see numerous green lines, and just 9 red ones.
We chose a single-sided design, accepting the possibility that some connections could match with others... just as happened.
So here the necessity to make 9 links on the other face of board, whose position is signed in red.
[In KiCAD, green is for the back side, while red is for the front: indeed the naming is not constraining; you just have to respect the main side chosen by yourself]
This means that the green lines will become copper traces, and the red ones will be made of metallic wires.
A good criteria to adopt about the position of components is to place the consistent groups as near one each other as possible.
For example: the diode protection in input, some capacitors and the first voltage regulator are required to be near the power jack, for clear reasons of security (diode) and consistence (regulator).
After that, the remaining space is in the right center: here the ATMega, the oscillator, the ICSP pins and the switch button go placed.
The last one must be easily accessible by the user, so it goes in on right.
The others are consequently put like you find see them on the PCB draw.
Back to the 9 links, we know that the less they are, the most robust the board is.
For a series of choices this has been resulting as the best solution: we think it's not the only possible, and maybe we'll improve it soon or later.