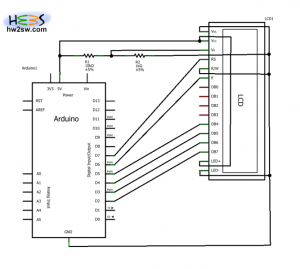
With the help of fritzing we can design the virtual circuit ...


All the fritzing designs can be downloaded from here : Arduino LCD
After the theoretical circuit it is time to solder the male pins into the LCD. A demonstration video can be seen below.
More about soldering we will learn in future articles.
As you can see we do not solder each pin individually but we use the "solder ball" method with the help of the gravity.
The trick here is to make a big solder ball that with the help of the gravity will pass over the pins and will solder each pin perfectly.
This method is ultra fast and it's only downside is that you might waste some solder if you are not familiar with soldering.
Now we can construct our circuit !
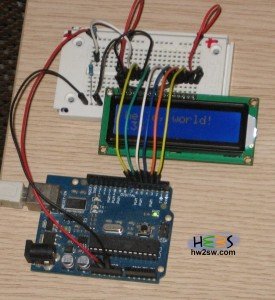
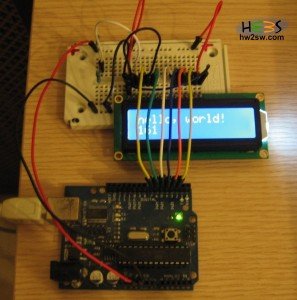
Below we can see the construction of this circuit on a breadboard.
The first phase is to connect all the power lines :


Now we connect the remaining LCD pins with the arduino's pins.


Once you have constructed the circuit it is time to test it.
LiquidCrystal has a helloword demo.
We will use this demo in order to check the functionality of our circuit.
Go to File -> Examples -> LiquidCrystal -> HelloWorld
Now we have to update the pins. Find the line :
LiquidCrystal lcd(12, 11, 5, 4, 3, 2);
and change it to the pins defined by as earlier :
LiquidCrystal lcd(7, 6, 5, 4, 3, 2);
Now you can compile and upload the sketch.
Below we can see a demonstration video
That's all for now !