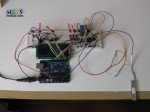
In the first part of liquid filler we have made the user interface.
LCD buttons and circular menu were made.
Now it is time to add the relay and the weight sensor.
We will keep working on our breadboard.
In this article we will see how to connect the relay then our load cell amplified by the INA125 and lastly the modified code from the last time.
It is highly recommended to read the relay article and the weight sensors introduction before you start.
Let's start with the relay. We have seen that the correct connection with arduino of a relay is in the schematic below.
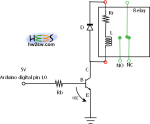
The RB should be 1-3K. Our relay will be a 5V relay with 70Ohm resistance.
It is extremely important to add a 1N4001 diode and as a transistor you should use a 2N2222.
We are going to use the 11 th digital port of arduino in order to pilot our relay.
Notice that the figure is taken from the older relay article.
We have seen various weight methods in the weight article . We are going to use a 20Kg load cell .
The load cell needs amplification.
We are going to use the INA125 amplifier.
The connectivity this time will be the schematic below.
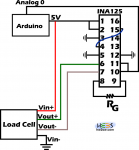
In this liquid filler version we are going to use a 20Kg loadcell so the RG should be around 15 Ohms.
Again take a look at the weight article if you can not understand the schematic.
The virtual schematic of the breadboard at this point becomes :
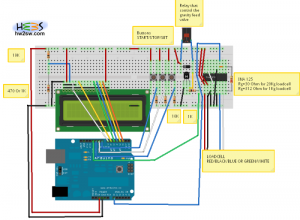
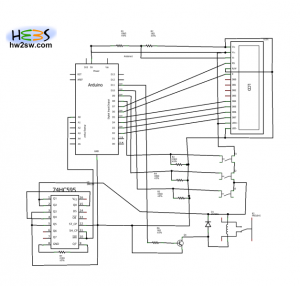
These files can be downloaded from here : LiquidFillerPart2fz
Pingback: How To Connect Load Cell To Arduino? | Click & Find Answer !