
The toner transfer method is one of the most common and cheap way to make Printed Circuit Boards at home.
Despite it's popularity this method has problems with it's repeatability since it has way too much factors that must be cleared in order to get some decent and stable results.
The method itself is pretty straight forward.
Print your circuit with your laser printer then put the printed circuit face down over a copper clad so that the toner touches the copper surface and then apply heat in order to transfer the toner from the paper to the copper.
Then you remove with water the paper and the toner will be printed into the copper clad.
Now you are ready to etch the board.
Then drill place the parts and solder.
While in theory this looks way too easy it is a nightmare if you do not have the right equipments.
Lets find out the problems.
- Paper
- Copper cleaning
- Heating
If you transfer the circuit into the copper you are done. The etching will work 100%
So as you can see the toner transfer method itself is the main problem.
Here is what do you need :
For printing :
- A PCB design [i am using KiCad in order to create my PCB designs]
- A4 normal 80gr paper sheets
- Advertising brochures or staples glossy photo paper for inkjet printer type. [i am using the advertising brochures from Lidl]
- A black and white 600 DPI laser printer [i am using the Samsung ML-1610]
- Scissors
- Transparent tape


For toner transferring :
- Copper clad FR4 1.6 mm thick
- Scissors
- Kitchen scrubs
- Cheap liquid soap for hands
- A hacked or not laminator [i am using a modified United Office ULG 300 A3]


For etching :
- Plastic coated wire 1mm diameter thick or more
- Etching solution [i use 170gr hydrochloric acid (HCl) 15%w/w with 200gr of hydrogen peroxide (H202) at 3%w/w]
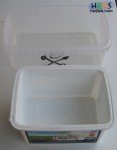
- Two plastic tank containers
- Protective glasses
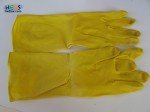
- Latex gloves
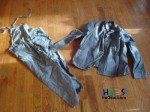
- Old clothes with long sleeves
- An open place (balcony, roof, garden etc…)
- Funnel



Finishing
- Acetone or gasoline for cleaning [i am using pure cleaning gasoline]
- Drill bits 0,5mm and 0,8mm [i am using ebay drill bits]
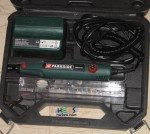
- A drilling machine [i am using the PMGS 12 A1 modelling and drilling machine from Lidl]
- A Wooden board



Some classic errors :
- Using wrong type of paper. Even some glossy photo paper won't work at all (like "pelican photo paper superior").
The paper must be thin, glossy, not plastic - Using an iron to heat
- Using sandpaper instead a normal kitchen scrub
- Using expensive disinfectant soap like dettol. This "brights, shines" the copper clad and the toner can not be attached into it.
- Using metal equipment (container, tweezers...) to etch
- Drilling before etching
Let's start ...



Pingback: Printer Upgrade Kit (Sharp AL11PK) (COPIERACC AL11PK) | PRINTER REVIEWS